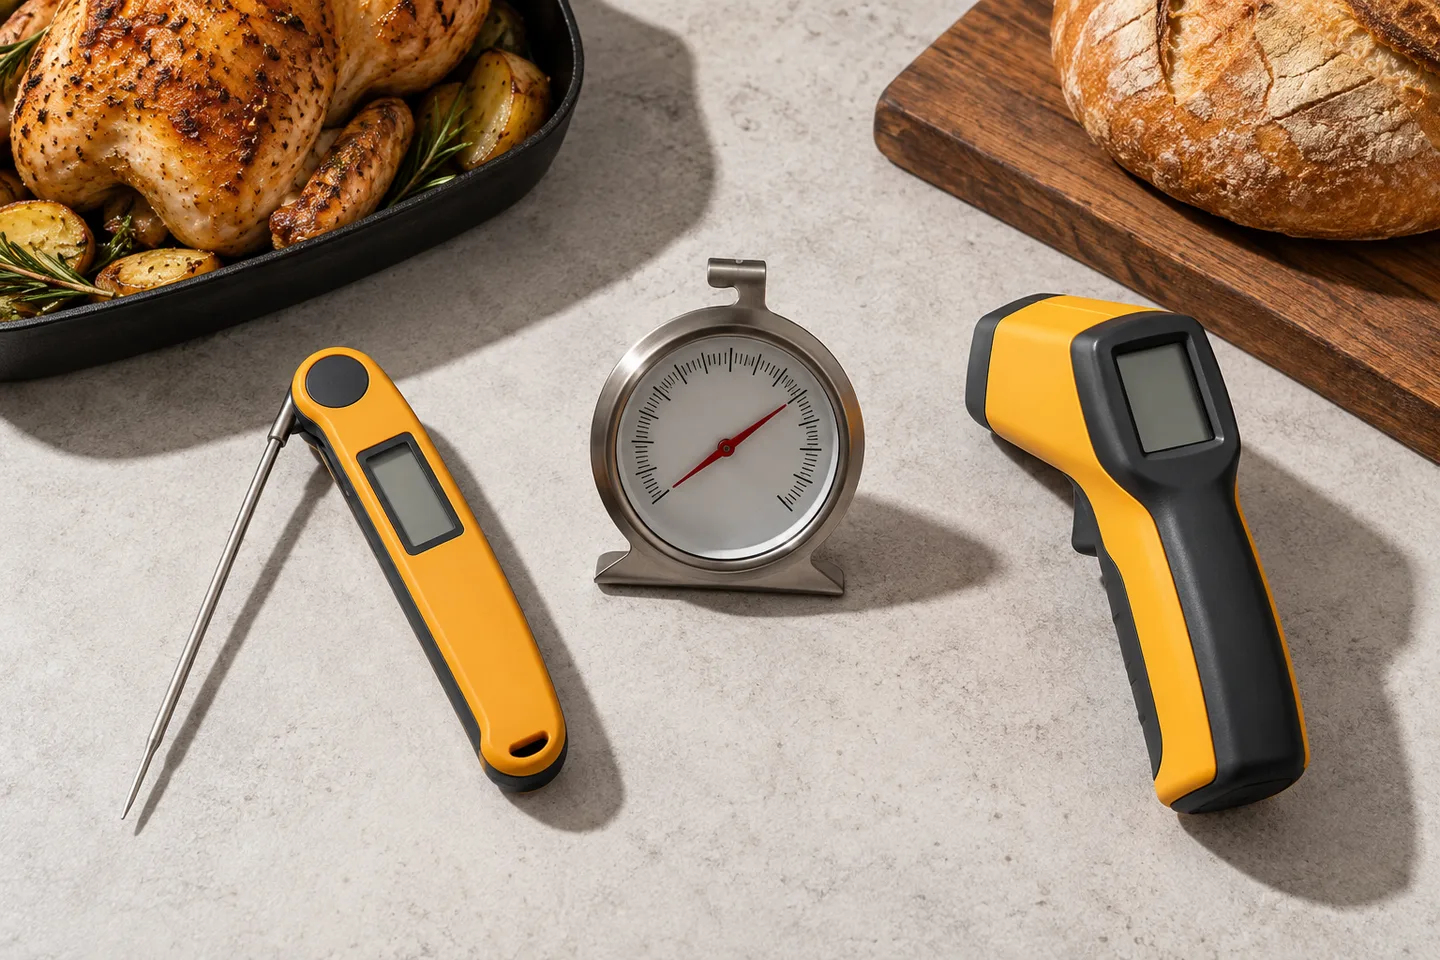
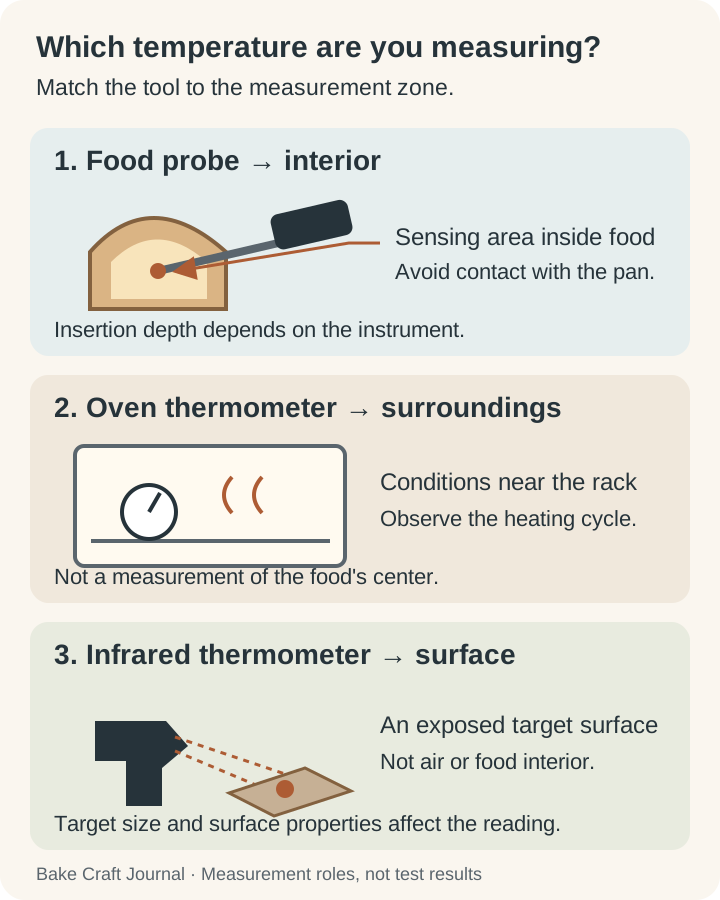
A baking thermometer is useful only when it measures the thing you need to know. An oven thermometer measures conditions around the food; a food probe measures inside it; an infrared thermometer reads a surface. Their displays may all show temperatures, but they answer different questions. Choosing by the task prevents a convincing number from becoming misleading advice.
For most home bakers, a suitable instant-read food probe and an oven-rated thermometer cover more everyday needs than a collection of specialized instruments. Start with the uncertainty in your baking, then choose a tool that can actually resolve it.
Choose by the question you need to answer
If cookies brown unevenly, you may want to investigate oven conditions and rack position. If a recipe asks for water at a particular temperature, you need a food probe suitable for liquids. If you want to check the surface of a baking stone, an infrared instrument may be relevant, with important limitations.
These are different measurements. The temperature at the center of a loaf does not reveal every hot spot in the oven. A hot stone surface does not prove that the air has reached the intended setting. A displayed oven temperature does not establish the internal temperature of a filling.
Write down the question before shopping: “Is my oven broadly operating at the intended temperature?” is more useful than “I want accurate baking.” It narrows the instrument, placement and reading procedure you need.
Temperature is one piece of evidence
Combine measurements with the recipe's other cues. Dough volume, cake structure and browning still matter. A thermometer can reduce one uncertainty without resolving ingredient balance, mixing technique or pan geometry.
Our guide to uneven oven baking separates temperature problems from airflow, position and pan effects. That distinction helps you avoid buying a tool for a problem it cannot diagnose.
Understand the three measurement zones
A food probe measures inside an ingredient or bake
An instant-read thermometer is designed for a brief measurement after its sensing area has made suitable contact with the food. Models vary in sensor location, required insertion depth, temperature range, response and cleaning requirements. Read those details rather than assuming that every thin-looking probe works the same way.
A slender probe is useful for many baking tasks because it makes a relatively small hole and can reach into dough, liquid or a baked item. It should be food-contact suitable and cover the temperatures you intend to measure.
Do not leave a handheld instant-read thermometer in an oven unless the manufacturer explicitly permits it. A heat-resistant metal tip does not make the display, handle or battery oven-safe. A leave-in probe system has different limits, including cable placement and maximum operating temperature.
Read the center rather than the pan
For an internal reading, position the sensing area in the relevant part of the food without contacting a hot pan, bone or another unsuitable surface. The USDA's food-thermometer guide explains placement and how sensing areas differ by instrument.
With a thin item, inserting from the side can sometimes make center placement easier, if the instrument and food allow it. For a large or irregular item, check more than one relevant position. A single shallow reading can describe the warmer exterior instead of the cooler interior.
Wait for the reading to settle according to the instrument's instructions. Pulling the probe out immediately can defeat the measurement. Keep your hand clear of the hot rack and support the pan safely; accuracy is not a reason to reach awkwardly into an oven.
An oven thermometer measures its surroundings
An oven-rated thermometer can help compare the oven's actual conditions with its selected setting. Choose an instrument intended for oven use, with a readable scale or display and a secure way to stand or hang at the position you need.
Start near the baking location, allowing space for airflow and keeping the instrument away from direct contact with a heating element. Its reading describes conditions at that location. Moving it elsewhere can change what you learn.
The USDA's appliance-thermometer guidance distinguishes appliance measurements from food measurements. Neither the oven control dial nor a probe inserted into a cake substitutes automatically for an appropriate oven check.
Watch a cycle, not a single moment
Many ovens cycle heat on and off around a setting. Give the oven and instrument time to stabilize, then observe the pattern over several cycles if you are investigating performance. Opening the door repeatedly changes the conditions you are trying to observe.
A single low reading just after loading a cold pan is not enough to prove a permanent calibration problem. Likewise, one high reading during a heating cycle does not establish the average conditions of the bake.
Record the setting, rack position, preheating process and readings together. If the oven remains substantially or unpredictably wrong, consult its manual or a qualified service technician. Do not attempt electrical adjustments on the basis of a food blog.
Infrared instruments read surfaces
An infrared thermometer estimates the temperature of a surface from emitted radiation. It does not measure the air temperature inside an oven or the center of a loaf. It also does not see through an oven window to measure the food behind it.
ThermoWorks' infrared use guidance explains surface measurement and the effects of target size and surface properties. Shiny metal can be particularly difficult because its emission and reflected radiation differ from those of many food surfaces.
The instrument's distance-to-spot relationship matters. Farther away, the measurement area may include more than the small target you meant to check. A laser pointer, when present, helps aim; it does not establish that every part of the measurement area falls on the intended surface.
When it is worth having
Surface checks can be useful for suitable baking stones or other tasks supported by the instrument's specifications. Follow the manufacturer's instructions for the material and emissivity settings. Keep any aiming laser away from eyes.
For ordinary layer cakes and bread, infrared is usually a supplementary tool. Buy it because you have a surface question to answer, rather than expecting it to replace an oven thermometer and a food probe.
Compare useful specifications and check performance
Compare specifications that affect your task
Resolution and accuracy are different. A display with decimal places can look precise without being equally accurate. Look for the manufacturer's stated accuracy over the relevant range, not simply the smallest number the display can show.
Response time matters when checking hot food briefly. Probe length and sensing depth matter when reaching the relevant area. A small thin cake and a deep liquid-filled pot create different placement demands.
For an oven instrument, legibility through the window and a stable mount can matter more than extra features. For a food probe, an easy-to-clean shape and clear instructions are practical strengths. For a remote probe, check both probe and cable limits.
Make the units obvious
Check whether the recipe uses Fahrenheit or Celsius and set the instrument accordingly. A plausible-looking number in the wrong unit is an avoidable mistake. When changing units, verify both the display symbol and the recipe target.
Storage features also affect daily use. A protected tip, accessible battery compartment and durable hinge can be useful. Do not equate a folding design with waterproofing; water resistance has its own stated limits.
Check performance without pretending to calibrate it
A properly prepared ice-water mixture provides a useful reference near 32°F (0°C) for a food probe whose instructions allow that check. It checks performance around that point; it does not demonstrate equal accuracy at every temperature used in baking.
- Use a clean container and pack it with ice, preferably crushed.
- Add enough clean water to fill the spaces while keeping plenty of ice present.
- Let the mixture settle and stir as appropriate to the instrument's instructions.
- Place the sensing area in the mixture without touching the container's sides or bottom.
- Wait for a stable reading and compare it with the expected reference and stated tolerance.
ThermoWorks' ice-bath instructions explain why a mostly water-filled glass with a few floating cubes is a poor substitute. Keep the handle and display out of water unless their rating permits immersion.
If the result is unexpected, repeat the check carefully, inspect the probe and battery, and consult the manual. Adjustment is available on some instruments, not all. Checking a fixed instrument is not the same as calibrating or certifying it.
Avoid an improvised boiling-water shortcut
Boiling temperature changes with elevation and atmospheric pressure, and boiling water introduces burn risks. If the manufacturer recommends a hot reference check, follow its procedure and the appropriate local reference rather than assuming every boiling pot is exactly 212°F (100°C).
Build a clean, repeatable measurement routine
Clean the probe between incompatible tasks
A probe can carry residues from one food to another. Clean it according to the manufacturer's instructions, especially after contact with raw ingredients. Follow any applicable sanitizing guidance rather than assuming that a quick wipe always makes it ready for finished food.
Do not immerse electronics that are not designed for immersion. Avoid bending a delicate probe or using it as a skewer to lift heavy food. Store it dry and protected so the sensing end stays clean and undamaged.
For an infrared instrument, keep the lens clean using the specified method. Grease, steam or dirt can interfere with the intended measurement. Cleaning the lens and correcting the measurement geometry are separate tasks.
Use measurements to improve a repeatable routine
Begin with one familiar recipe. Note what you measured, where you placed the instrument, when you took the reading and what the cooled bake was like. A number without context is hard to use next time.
For bread, an internal reading may support a recipe's doneness guidance, but it cannot repair dough that was inadequately developed or fermented. Our dense-bread guide explains why texture involves the entire process.
For cake, do not choose a universal internal finish temperature and impose it on every formula. Use the recipe's intended completion cues. Before decorating, also check practical cooling readiness in our cake-cooling guide.
Safety targets need the right reference
When a food requires a safety temperature, use authoritative guidance for that food and a correctly placed food thermometer. A pleasant crust color or an infrared surface reading cannot substitute for the required internal check.
Temperature at one moment also does not establish storage history. For chilled desserts, the handling and refrigerator conditions discussed in our cheesecake storage guide remain relevant. No instrument can reconstruct time spent out of refrigeration.
Measuring water and other liquids takes suitable contact
When checking water for a bread recipe, use a food probe rated for the task and place its sensing area in the liquid, clear of the vessel's walls and bottom. Gently stir when appropriate so you are not relying on a locally warmer or cooler patch. Check the recipe's units before comparing the result.
For hot sugar or a deep saucepan, a clip-on or other purpose-designed instrument may be more practical than holding a short probe near steam. Confirm its temperature range and mounting instructions. Specialized high-temperature work has different handling demands from checking cool mixing water, so choose equipment and a method that safely fit the job.