Light-colored metal is a practical default for many cakes, cookies and brownies because it transfers heat efficiently and matches the bakeware used in many recipes. Glass can be useful for dishes where visibility and serving presentation matter, but it behaves differently and has specific safety limits. Neither material is the best choice for every bake.
Choose the pan the recipe specifies first. Changing material while keeping the same size, temperature and time can still change browning and how the center finishes.
Compare heat behavior before choosing a pan
A decision table for common home baking
| Need | Metal may suit it when… | Glass may suit it when… |
|---|---|---|
| Layer cake | The recipe expects a straight-sided metal cake pan | A recipe specifically uses an appropriate glass dish |
| Brownies | You want to follow a metal-pan formula closely | The recipe gives glass-pan adjustments and cooling guidance |
| Pie | Efficient bottom-crust browning is the priority | You value seeing the underside and the recipe suits the dish |
| Serving from the pan | The pan's finish and handling suit the presentation | An oven-rated dish suits baking and table service |
| Rapid temperature changes | The specific product permits the intended handling | You can stay within strict glass-use instructions |
The table does not override manufacturer instructions. A product may have restrictions beyond its material category, including broiler limits, maximum temperatures, coatings and permitted appliances.
The important difference is heat behavior
Metal generally transfers heat to the batter more readily than glass. Glass warms differently and retains heat after removal. That can change the relationship between finished edges and a still-baking center, especially in brownies or a deep cake.
Thickness and construction matter within each material. A thin dark steel tin is not identical to a sturdy light aluminum pan. A thick glass dish is not the same as a shallow metal sheet. “Metal” and “glass” are starting categories, not complete performance specifications.
King Arthur's comparison of baking materials discusses the different results possible when one recipe moves between them. The useful lesson is to follow the intended pan and evaluate doneness after any substitution.
Choose by the bake: cake, brownie or pie
For cakes, start with the recipe's metal pan
Many layer-cake recipes are developed around metal pans with relatively straight sides. Matching that shape and material gives you a more predictable baseline. A casserole dish with sloped walls may not produce the same layer even if its advertised capacity is similar.
Pan color affects browning too. Dark surfaces can produce more rapid exterior color than a light pan. If the recipe mentions dark-pan adjustments, use those directions. Do not assume every metal tin belongs in one temperature category.
A cake that browns before its middle sets needs more than a material verdict. Check depth, temperature, mode and ingredient balance. Read why cakes sink if the center collapses after baking.
For brownies, size and carryover heat are especially noticeable
A brownie formula intended for a light metal pan can behave differently in glass. The exterior may finish on a different schedule from the middle, and the hot pan continues to influence the bake during cooling.
Use a recipe-specific glass adjustment when available. Some general baking guidance suggests reducing oven temperature for glass, but a fixed reduction is not a universal solution for every formula, depth or dish. The original baking time may no longer fit.
Follow the cooling and lifting method as well. A parchment sling can help in suitable recipes, but it needs to be used within the paper and pan instructions. Do not lift a fragile, hot slab just because you want to stop carryover heat.
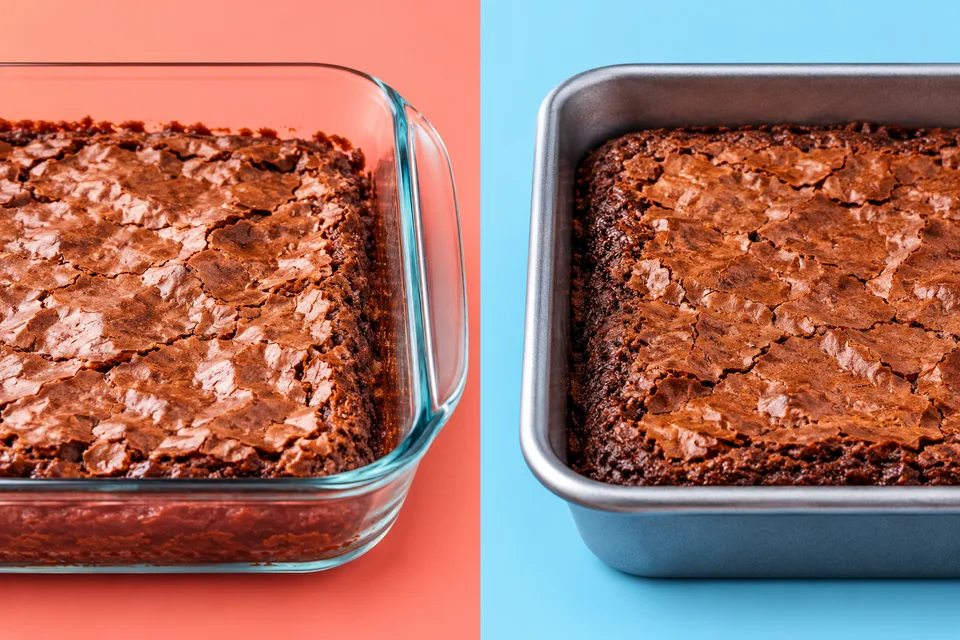
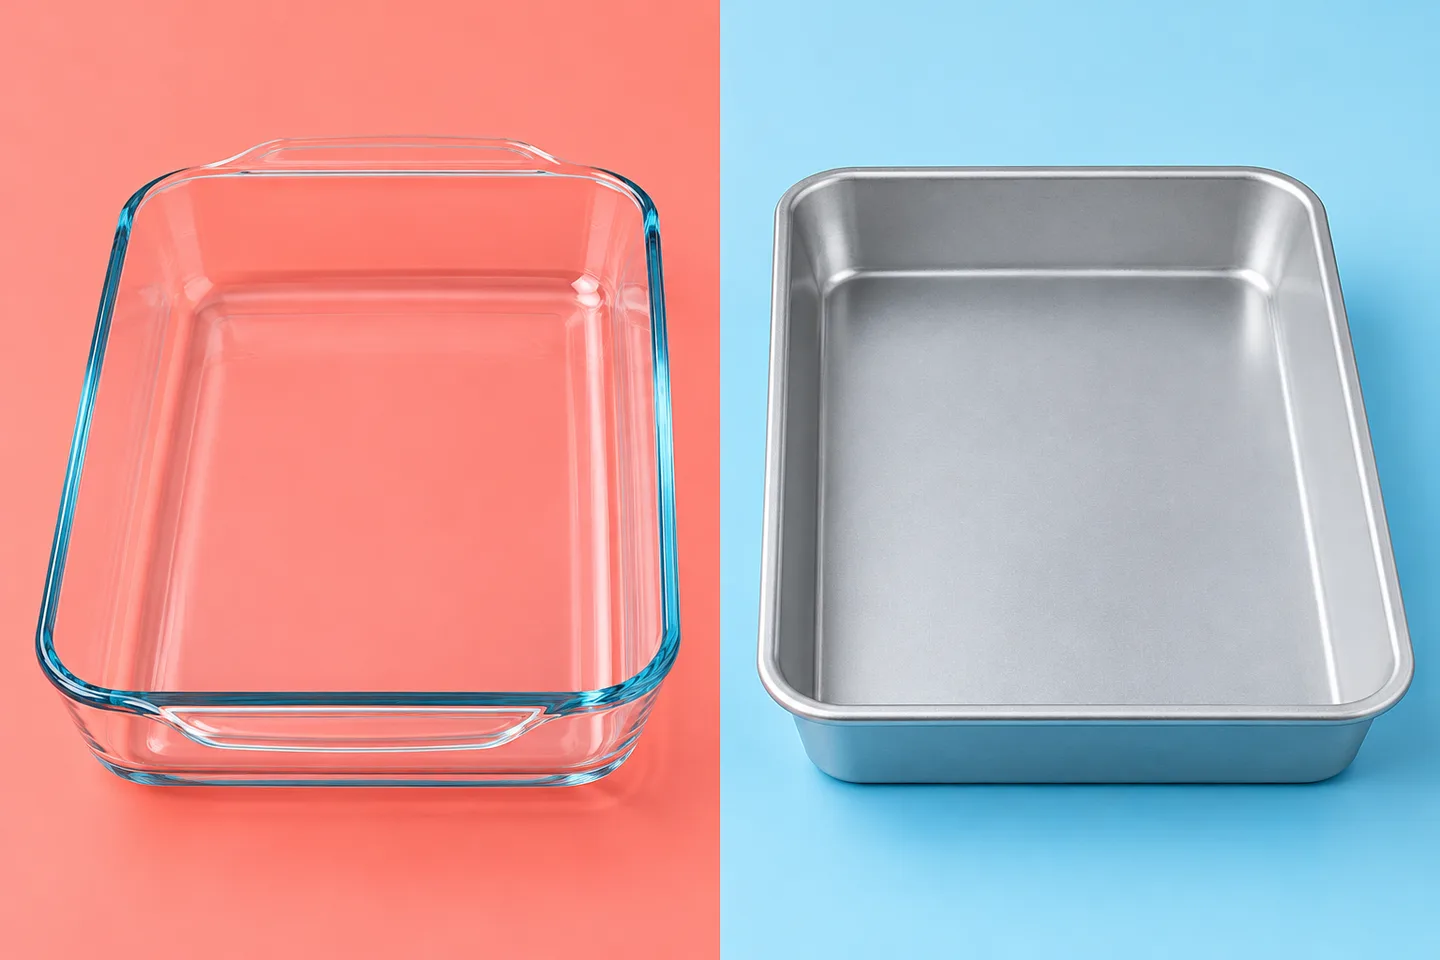
The comparison image is illustrative, not a test performed by this journal. If you want to compare your pans, use the same recipe and measured batter, record the change, and judge the cooled texture rather than only the hot edges.
For a dry batch, see why brownies turn dry instead of fudgy. Material is one possible factor, not the only one.
Visibility can be useful for pie
A clear dish lets you inspect some of the bottom crust's color, which can be helpful when judging a pie. Metal often gives efficient heat transfer for browning. The best match depends on the recipe, filling and baking method.
Place the dish where the recipe directs and check whether any baking stone or preheated surface is appropriate for that specific glass product. Do not copy a metal-pan technique onto glass without reviewing its temperature-change limits.
A deep-dish pie plate and a shallow plate are not interchangeable merely because both are labeled 9 inches. Depth and side slope affect filling capacity. Material choice cannot compensate for overfilling.
Two practical reasons to choose different pans
A baker who repeatedly makes layer cakes may value straight sides, repeatable heating and easy release. Matching light-metal pans can make that routine simpler. The fact that a glass dish looks attractive on the table does not make it a better layer-cake mold.
A baker preparing a dish meant to be served from its container may value visibility and presentation. An appropriate glass baking dish can fit that goal when the recipe supports it. The same person may still use metal for cookies and cake layers. There is no contradiction in owning different materials for different jobs.
Let the recipe tell you which property matters
A method aiming for a browned pie base, a tender cake edge or a dense brownie center uses heat differently. Look for the author's pan choice and any notes about color or material. Those notes are part of the method, not decorative equipment preferences.
If the recipe is silent, a light-metal pan is a useful baseline for many standard cakes and bars, provided its shape and size match. For a glass substitution, find relevant guidance rather than guessing that the original schedule will transfer.
Check the handling limits of each material
Glass bakeware has boundaries you must respect
Use only a glass product intended for the appliance and temperature. A serving bowl, drinking glass or decorative dish is not bakeware simply because it looks sturdy. Read the instructions for the actual product, including any vintage item whose history is uncertain.
Pyrex's current FAQ warns against direct heat uses such as stovetops and broilers for its glass bakeware, adding liquid to hot glass, and placing hot glass on cold or wet surfaces. It also warns against using chipped, cracked or deeply scratched pieces. Follow the exact instructions supplied with your dish, since products and regions differ.
Temperature-change instructions are product-specific
Do not assume every glass dish can move from freezer to oven. Thaw food in a suitable safe way and follow the dish's stated handling instructions. Avoid an improvised counter thaw that keeps perishable food warm too long merely to warm the glass.
Set hot bakeware on a dry, heat-safe support permitted by the manufacturer. Keep cold liquid away from hot glass. Inspect the dish before use and retire a damaged piece rather than treating a crack as cosmetic.
These handling rules are a separate issue from browning quality. A dish that bakes a good cake still must be used safely. Likewise, a product's oven rating does not make it suitable under a broiler or on a burner.
Metal pans also have instructions
Coatings, bonded layers and handles can create limits that plain material names do not reveal. A nonstick pan may specify utensil and cleaning restrictions. A removable-base pan may leak with a thin batter. A warped sheet may sit poorly on a rack.
Do not assume metal tolerates every abrupt temperature change or every cleaning chemical. Follow the maker's directions. Avoid using damaged coatings or improvised repairs to make a pan seem usable.
For cleaning, our baking-sheet guide begins with identifying the material and finish. A method suited to uncoated stainless steel may be wrong for aluminum or nonstick bakeware.
Make the substitution useful and repeatable
How to make a controlled pan substitution
- Compare the actual inside dimensions and batter depth, not just the label.
- Check the recipe for material-specific temperature or time guidance.
- Confirm the new pan's manufacturer instructions.
- Keep other ingredients and methods unchanged.
- Start observing at an appropriate early point and use the recipe's doneness cues.
- Record the result after cooling, including edge and center texture.
If you change size as well as material, the comparison becomes harder. Use the cake-pan size guide to preserve a reasonable batter depth. An exact temperature adjustment cannot solve a pan that is much deeper than intended.
Keep a substitution record you can reuse
Write down the original pan and the replacement's inside dimensions, depth, material and finish. Record any stated recipe adjustment and the cues used to end baking. Compare the cooled center and edge instead of only the browned surface.
If the new pan works, repeat the same setup before calling the adaptation dependable. A change in batter quantity or oven mode on the second attempt can undermine the comparison. A successful home observation remains specific to that recipe and equipment.
Do not use extra heat to force the wrong vessel
If a deep glass dish leaves the center slow to finish, simply increasing heat can darken the outside faster without solving the heat path. Review depth and recipe suitability. A shallower, correctly matched pan may be the better solution.
Likewise, a metal sheet that produces quick bottom color may require the recipe's dark-pan or rack guidance, not a conclusion that all metal is unsuitable. Separate finish, thickness and position from the broad material category.
Buy a pan you can use and care for
What to buy for a small kitchen
If you mainly bake layer cakes, cookies and brownies, a few reliable light-metal pans matching your regular recipes are a sensible starting kit. Add a glass dish when a specific recipe or serving routine makes it useful, rather than collecting every material at once.
Choose equipment that fits your oven and storage. A pan that nearly touches the oven walls or cannot sit level is inconvenient regardless of its theoretical thermal advantages. Check handles, rims and actual dimensions before buying.
Do not use price alone as a proxy for performance. Good fit, clear instructions, suitable construction and repeatability matter. This guide does not rank brands or claim hands-on product testing; it explains the decisions that help you choose for your own baking.
Think about care before choosing material
Glass requires careful handling around sudden temperature changes and impacts. Coated metal requires protection from incompatible utensils and cleaning methods. Uncoated metal has its own chemical and dishwasher limitations. Every option asks for a care routine.
Choose the routine you can follow reliably. If you routinely need to move frozen portions into a hot oven, do not assume a glass dish can support that process. Choose a recipe, container and thawing sequence that fit both food-safety needs and equipment instructions.
Retire damage rather than inventing a workaround
A chipped glass edge, peeling coating or severely warped pan changes the decision. More parchment does not restore structural integrity. Follow the maker's replacement guidance and avoid turning a damaged product into an experiment.
A sound, familiar pan used correctly is a better tool than a theoretically ideal material whose instructions you cannot follow. The practical choice joins baking performance, safe handling, cleaning and the recipes you use most.